Hanes
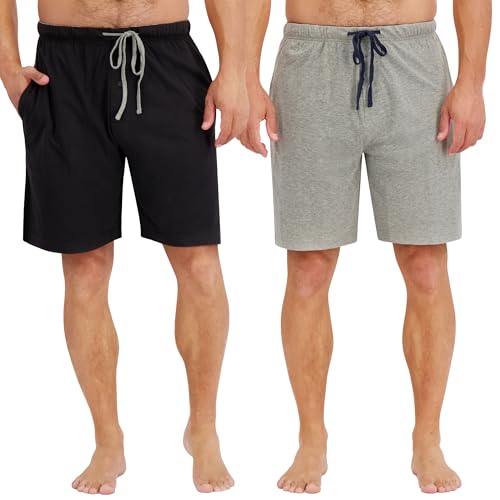
Hanes Cotton Pajama Shorts 2-Pack, 7.5 Inch
The listed 7.5-inch inseam makes these easier to compare for coverage than shorts described only as loose or lightweight.
Check on AmazonThe details / Sleepwear guidance
A consistent measurement method is more useful than a very precise number taken from an unclear starting point.
A flat waist of 16 inches is not the same thing as a recommended 32-inch body waist. A rise measured through the entire crotch is not a front rise. Small ambiguities like these can make two sets of shorts measurements look comparable when they are not.
The method below creates a repeatable record of one garment. Use it to compare pairs measured the same way, describe a fit problem, or ask a seller a precise question. It is not a universal manufacturer measurement standard.
As an Amazon Associate I earn from qualifying purchases.
The listed 7.5-inch inseam makes these easier to compare for coverage than shorts described only as loose or lightweight.
Check on Amazon
A stated 7-inch length, cotton knit construction, drawstring and elastic waistband make this one of the clearer title-level specifications.
Check on Amazon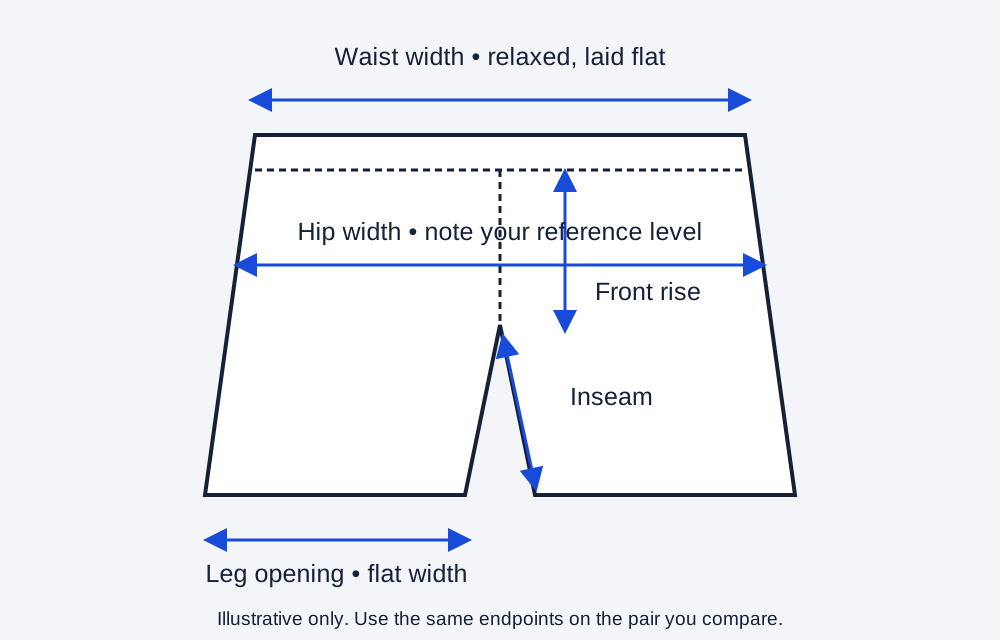
Use a flexible tape measure, a flat surface larger than the shorts and a way to record the results. A ruler can help keep a crosswise measurement straight. Use one unit system throughout; converting some dimensions while leaving others in inches creates avoidable confusion.
Measure a fully dry garment in a relaxed state. If you want the dimensions of your familiar, already-laundered pair, say so in your notes. A new, unwashed pair and one you have worn and laundered are different reference conditions. You do not need to predict future changes to document their current state accurately.
Empty the pockets and untie the drawstring so it does not cinch the waist. Close any intended fly fastening. Smooth obvious wrinkles with your hands, but do not pull the fabric taut or try to force every curve into a rectangle.
Photograph the whole garment before measuring. This preserves useful context: whether the hem curves, whether there are side splits, and where the waistband seam sits. A number without the garment’s shape can be misleading later.
Place the shorts front side up. Arrange the waistband so its left and right edges lie naturally opposite each other. Measure straight across from outer edge to outer edge without stretching the elastic. Record the result as “relaxed flat waistband width.”
If the band is curved or the back rises above the front, describe how you positioned it. Do not pull the back down hard merely to align its top with the front. The objective is a repeatable arrangement, not the flattest possible photograph.
Doubling a straight flat width gives a simple comparison value, but it does not reveal a recommended body waist or the band’s comfortable working range. An elastic band can extend, and the amount of force needed to extend it matters to feel. A home flat measurement does not establish that force.
Avoid recording a maximum stretched waist. Pulling as hard as possible is neither a useful comfort test nor a reliably repeatable method. If a seller provides a stretched measurement, ask how it was obtained before comparing it with your own relaxed number.
For a practical home comparison, choose a horizontal line below the top of the waistband that crosses the seat area. Measure straight from one outer side edge to the other, then record how far below the top edge that line sits.
For example, write “hip width 22 inches, measured 7 inches below top of front waistband.” Those are illustrative numbers. The useful part is the stated location. Another person measuring the widest-looking part at 9 inches down could obtain a different number from the same garment.
Keep the front and back lying naturally together. Do not stretch the side edges apart to flatten a seat curve. If the shorts will not lie perfectly flat, take a photograph of the arrangement and note the limitation.
When comparing two very different rises, a fixed distance below the waistband may cross different parts of each pattern. You can record an additional widest flat width, clearly labeled, but do not silently swap between methods. Consistency is what makes a comparison interpretable.
Lay one leg so the finished opening is relaxed. For a straight hem, measure across the opening from edge to edge and label it “flat leg-opening width.” Repeat for the other leg instead of assuming they are identical.
A curved dolphin hem or high side split needs more description. State whether your tape follows the finished edge or measures a straight span between endpoints. Those are different measurements. For comparing the usable opening, a straight flat span plus a photograph is often clearer than a single unexplained perimeter number.
If there is a side split, record its height separately from the lowest finished hem to the top of the open split. Do not count that split height as inseam. It describes the side opening, which can matter even when the inner-leg lengths match.
Avoid stretching a fitted leg opening to make it resemble a loose short. The relaxed dimension is an observation. Its comfort on a thigh requires a separate fit check.
Find the crotch junction where the inseams meet the front and back crotch seams. Measure along the front center seam from that junction to the top of the waistband. Follow the seam’s curve with the flexible tape rather than measuring a straight diagonal across the fabric.
Turn the garment over and repeat along the back center seam. Label the two results front rise and back rise. State that you included the waistband. If another source measures only to the waistband joining seam, its number is shorter by a different reference point, not necessarily a different garment.
Some garments have an inserted gusset or a construction that lacks a single clear junction. In that case, choose and photograph a specific reference point, such as the midpoint of the gusset edge, and explain it. Do not imply that your result matches a conventional seam-junction measurement exactly.
The distinction matters because Lands’ End’s measurement instructions use a full body path through the crotch for their “rise” description. That is a different quantity from the two separate garment-seam measurements here. The shared word does not make the numbers interchangeable.
For inseam, start at the crotch junction and follow the inside-leg seam to the finished bottom edge. Keep the tape on that seam’s path. Do not start at the waistband or measure down the outside of the leg; those would answer different questions.
Measure both legs, especially if you are investigating an apparent difference. With a curved hem, finish at the edge reached by the inseam rather than the lowest point somewhere else on the garment. With a permanent cuff, include the finished garment length as worn, not hidden fabric inside the cuff.
An ordinary comparison pair should be similar enough in construction that the number is meaningful. A garment with a very low crotch can have the same inseam as another pair while its hem sits differently on the body. Record rise alongside inseam so you do not make length do every job.
For a concrete listing comparison, Hanes’ listed 7.5-inch pajama short gives you a stated inseam to place beside your own reference measurement. The selected Hanes Amazon listing also names the color and size shown. If you are considering more leg coverage, the long sleep shorts collection is the relevant next stop; this protocol tells you how to document your starting pair.
| Field | Illustrative record | Why the wording matters |
|---|---|---|
| Condition | Dry, previously laundered, drawstring untied | Defines the state of the garment |
| Waist | 16 inches, relaxed flat width | Not a recommended body waist |
| Hip | 22 inches flat, 7 inches below front top edge | Identifies the horizontal level |
| Leg openings | Left 12 inches; right 12 inches flat | Records both sides |
| Rise | Front 12 inches; back 15 inches; band included | Separates the seam paths |
| Inseam | Left 6 inches; right 6 inches | Uses crotch junction to finished hem |
These numbers describe a fictional garment and are not a size recommendation. The record is useful because another person could repeat the procedure and understand what each number means.
If two readings differ, reposition the garment and repeat the measurement from the same endpoints. Check whether the tape followed a curve on one attempt and a straight line on the other, or whether you accidentally stretched the elastic.
Do not average a relaxed waist reading with a stretched one. They describe different conditions. Likewise, averaging front and back rise destroys the information you set out to capture. Keep distinct measurements distinct.
A small home measurement difference may come from positioning rather than a meaningful fit change. Avoid reporting more precision than your method supports. A clear fraction or decimal with a photograph is more useful than several decimal places produced by a calculator.
When you send a question to a seller, include the method: “Could you provide the relaxed flat waist width for this size, with the drawstring untied?” That is much easier to answer consistently than “How big is the waist?” For applying the response to a purchase, move to interpreting a sleep-shorts size chart; measuring the garment and choosing a size are separate steps.
No. Waist, hip and leg-opening widths may sometimes be doubled for a rough circumference comparison, but rise and inseam are lengths. Always retain the original flat measurement and method, and do not treat a doubled elastic waist as a recommended body size.
In this home protocol, yes: each rise ends at the top edge. Other sources may stop at the joining seam. State your endpoint so you can compare like with like.
Record the exact endpoints and include a photograph. A curved opening or inserted gusset can prevent a direct comparison with a conventional straight-hem, seam-junction measurement. Describe that limitation instead of hiding it in a single number.
Measure the relaxed garment from named reference points, keep front and back rise separate, and label every width and length. A repeatable record with clear endpoints is more useful than a number whose method is unknown.
As an Amazon Associate I earn from qualifying purchases.
The listed 7.5-inch inseam makes these easier to compare for coverage than shorts described only as loose or lightweight.
Check on AmazonA stated 7-inch length, cotton knit construction, drawstring and elastic waistband make this one of the clearer title-level specifications.
Check on AmazonThe details
Before finding your row, find out what the chart is actually measuring.
The details
Use a pair you know as the reference; a height chart cannot choose your preferred hem.
The details
Choose where you want the band to sit, then see whether the whole garment supports that position.
The details
When a product page disagrees with itself, preserve the exact offer and isolate the field that matters.
The details
Turn “runs small” into a precise fit question you can answer with measurements.
The details
Look at where fabric pulls before deciding how much room to add.
The details
First find out whether the garment moves around you or its shape has changed.
The details
Measure the dimension that changed, not just the size label.